Leatherworking
For a lot of people starting out, leatherworking can be an overwhelming process. There are many different tools you’ll need, skills to learn and new materials to understand. This guide will give you a head start so that you don’t get overwhelmed. It’s full of helpful information, tips and tricks, and advice on how to prepare for your leatherworking journey.
Leatherworking is one of the oldest forms of craftsmanship in the world, and even though most people use modern leathers for their bags and purses, it is still a wonderful, exciting hobby that can be as much fun as a person can have with their hands.
Leatherworking began in pre-history, and there are carvings as far back as Egypt in 4,000 B.C. that depict the crafting of leathers. Many of the early pieces of leatherwork were done by hand, which sometimes made it challenging to create works of a consistent size and shape. This all changed with the invention of industrial machining and the sewing machine in particular. Invented in 1846 by an American tailor, the sewing machine proved to be an essential tool in the development of leatherworking since it made consistent stitching a reality.
In modern times, however, leatherworking has become an artisan pursuit and a good income for many around the globe.
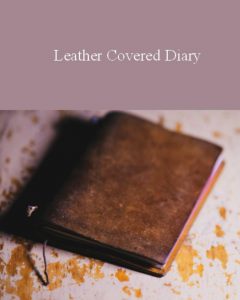
Image by Ulrike Leone from Pixabay
In this article, I am going to give you a starting point to explore the world of leatherworking and show you how to take your leather projects to the next level.
1. What Can Leather Be Used For
One of the reasons leather has endured as a material is because it is so flexible. It’s a quality material, has good durability and is not overly expensive.
It can be shaped into anything from a belt to clothing to shoes. Leather of course has been used for centuries for book coverings. Leather can also be used for larger projects such as furniture and accessories. One of the most popular leather uses is for bags because it is soft, durable and easily customizable.
Here are some of the things you might consider doing with your new skills.
* Leather Clothing
* Leather Shoes
* Belts Or Straps
* Saddles, Harnesses, And Other Horse Tacks
* Wallets, Purses And Book Covers
* Other Accessories
* Table Decorations & Drinking Vessels
* Furniture
If you’re very adventurous, you could try your hand at making leather armor, shields, weapons and more.
Leather is a versatile material. It’s also straightforward to work with and can be dyed or treated in several ways to make it harder, last longer and look better.
2. Tools Of The Trade: What You Need In Your Kit
In the world of leatherworking, there are many different tools that you can use to create a wide variety of finished products. The right tool will help you cut better, punch holes more precisely, weave straighter seams, and produce a better product overall. New crafters must understand the basics of each type of tool and how each is used for different applications.
2.1. Awls
An awl is a versatile tool with a sharp point and a shaft made of metal or wood. It’s used for cutting and pushing leather. The awl is also known as an “auger,” which may date back to medieval times when it was used as a glue-piercing tool in construction.
2.2. Burnisher & Slicker Tools
Another tool that plays a tremendous role in leatherworking is the Burnisher & Slicker. The Burnisher is used for surrounding a project with a smooth, crisp, and even sheen. The Slicker is used to spread melted wax or liquefied resin into the leather’s surface with light pressure to dry evenly and quickly and create an almost invisible surface for stitching.
2.3. Cleaning & Conditioning
You’ll need to clean your leather to prevent it from becoming dirty or dry and condition it to keep it soft. Two main types of cleaning or conditioning need to be done on leather: wet-cleaning and dry-cleaning. Sandpaper is also used for the same purpose, curing waxes such as beeswax conditioner on different surfaces (e.g., cedar).
Wet-cleaning leather includes scraping, sanding, and brushing the surface. You will also need to use a soap such as saddle soap or tree barks mixed with water and clean water. The procedure for wet-cleaning leather can be done on almost any surface harder than the leather itself. Soap solutions can soften the fibers on rigid surfaces like shoes and give them a longer life span than water alone.
To dry-clean leather, you’ll want to use a dry powder such as corn starch or rice. The process of using the powder is similar to how you would dust a room with a feather duster. You can also use a toothbrush for hard-to-reach areas on the leather.
2.4. Creaser & Folder Tools
In leatherworking, the Creaser & Folder Tools are used to adjust and fold the edges of a cut piece of leather. The Creaser operates by spreading rawhide glue over the edge side of your project and then rubbing it with a folder-overlap tool. The process is repeated on both sides of your project. These two tools help provide an airtight seal with just one application because they fill in any gaps between layers or tears in the edges.
2.5. Knives And Bladed Tools
Knives and bladed tools are integral in the leatherworking process. A knife is used to trim leather, split pieces of unfinished leather, make cuts for stitching holes or adding a decorative fringe, and cut out shapes for embellishments or designs. Blades can be made of metal or plastic.
The bladed tools available in this field are awl-point blades (see above), folding blades and pliers.
The needle blade has a sharp point on one side that can be necessary to stitch through the material without tearing it apart.
Folding blades have a creased edge on one side that allows them to fold into themselves easily and create smooth seams without any gaps when used with materials like supple leather.
The pliers have sharp points on the handles and are used for cutting fine strips off hides, cutting parings, or other materials like leather scraps within a project. This tool will also help to avoid damaging the edges of your leather.
Sewing tools are also essential to hold materials in place while you stitch them together or secure them with rivets or snaps. These tools include needles, thimbles (also known as bodkin), and shears.
3. Understanding Raw Materials And What You’re Doing
There are many types of leather that you’ll be able to use for different projects. For example, some leathers will be best used to create outerwear, while others are good for making handbags. Here are a few of the more important ones you should know.
3.1. Vegetable Tan Cowhide
Vegetable-tanned cowhide leather is a type of leather that you use primarily for outerwear. It’s usually made from the hide of cows and tanned by using vegetable extracts like oak tree bark, sumac leaves, and mimosa. This process gives the leather a soft texture that is comfortable to wear. Vegetable tan cowhide leathers are not water-resistant and should only be worn in moderate climates.
3.2. Chrome Tanned Cowhide
Chrome tanned cowhide leather is another material used for outerwear, but it has a stiffer texture, making it more durable than vegetable-tanned cowhide. It’s often made from the hides of calves or lambs and treated with chromium salts instead of vegetable extracts during the tan.
3.3. Oil Tan
Oil Tan is leather where the surface has been treated with oil, giving it a smooth and deep color, achieved by applying oil or fat to the leather while still on the drum, using a beam sprayer or similar tool. The oil does not soak into the leather but fills the pores and smoothes over the surface.
3.4. Thin Leathers
Pigskin, lambskin and goatskin are all examples of “thin” leather. These leathers have minimal body shape and are used where low weight or bulk is important. Thin leathers demand more refined tooling, higher-quality threads and much more patience than their stiffer cousins.
A lot of the sewing for thin leather is done by hand, either with a running stitch or whipstitch, which can be as simple as strings sewn onto a square-ended bookbinding needle or as complex as machine sewing with thick thread on heavy needles. The thinner the leather becomes, the more troublesome it is to sew by hand because it tends to stretch under stress.
3.5. Hair On Leathers
Some leathers still have the hair and fur left on. These are called ‘Hair On’ leathers and can be used in the same ways as ‘Whole’ leathers. The advantages are that the hair on makes an exciting surface to work into. For some reason, it is much easier to find finished examples of leathers with hair on than entirely smooth leathers.
Compared with other types of leathers, ‘hair on’ is much more likely to have a lot of grain across its surface and therefore, it is harder to work into or out of one piece.
3.6. Deer Leathers
Deer Leathers are all made from the hides of deer. They’re known for their softness and smooth surfaces. You will often use them when you want a softer, more supple leather that doesn’t need as much care as some other types, such as ‘Medium Calf.’
3.7. Bison Leathers
Bison leathers are soft and supple, and they can be applied to decorate many different items such as jackets, belts, furniture, etc. As with most deer leathers, you will have to care for them more because of their thickness and heaviness. Bison leather develops more of a lighter color over time due to the structure of the grain in its skin, which changes when wetted out and dried [like denim].
A rough bison leather (RoughTooth) is made from the welt side of the skin. The wild side of the hide is first tanned using a natural tanning process to remove all hair because this can result in some scratches or marks on your finished pieces caused by hairs.
There are other sorts of leather available such as exotic animals (fish, lizards etc.) and Rawhide. These out-of-the-ordinary leathers are often used for projects that need something more unique. As a beginner, you really shouldn’t have to bother with them much.
4. The Working Process For Leather: Stages Of Work
There is no set way to make your leather creations, it tends to change depending on what you’re making, but it’s a good idea to understand some of the stages you’ll have to go through.
4.1. Measure & Cut Pieces
Measurement for leather is done with a ruler or straight edge, a craft knife with a sharp blade, and a pencil. You will also need two hide strips to cut out your piece.
If you are making something like a sword, or any other patterned shape, have a plan & design in mind before you start cutting. Try to layout the pieces on the hide to not be too bulky when sewn together. Please ensure all your measurements are correct, and the material is laid out correctly before cutting (this may require more than one try). Use your ruler or straight edge to measure the sides of the pattern against and make sure they are parallel and straight. When laying out a design, if it is symmetrical, you can usually lay half of it out at a time instead of doing both sides.
4.2. Bevel Edges
Beveling the edges of your leather helps it to lay flat and minimize space. If you’re not familiar with how to do this, try placing a piece of 1/4 inch scrap leather on your work surface and cutting it into a long strip. Place the ribbon in front of you, then cut another piece so that you have two strips that are both roughly the same size as your leather. Turn one face down and lay it on top of the other, then use a craft knife to cut away some of each side. You should end up with an L shape at one edge with a rounded corner on either side. Use more or less beveling depending on your needs.
4.3. Sand Edges & Back Of Leather
Sanding is the process of using a piece of sandpaper to remove the surface layer of material. If you are not familiar with how to do this, try placing some scrap leather on your work surface and make sure it is set on something flat to be easily placed in front of the sandpaper. Rotate both pieces around as you go for an even finish, and don’t forget about dusting off or clearing off any excess debris! You should end up with a smooth, polished appearance on one side and an uneven texture on your other side; this doesn’t have to be symmetrical.
4.4. Use Neatsfoot Oil To Soften Leather
Neatsfoot oil is a yellow oil that’s used to soften the leather fibers, making cutting easier.
You will need a pair of leather gloves and paper towels for this. The gloves are essential because hand oils can cause your rawhide or aniline leathers to become sticky and dirty-looking.
Take out 1/4 of your jar of neatsfoot oil and pour it onto a paper towel. Rub your hands together to create friction which warms up the oil and makes it easier to work with. Once you have warmed up enough oil, rub both hands in circular motions on one side of the piece of leather (only using one hand at a time). If it needs more than one coat, apply it but make sure to use protective gloves. The goal is to have a soft finished leather by the end.
4.5. Gum Tragacanth To Slick Edges & Back Of Leather
Gum Tragacanth is a natural gum that you use to make your leather all shiny. You Apply it to the back of the leather and work it into a thin layer. Work it into the edges with a toothbrush so that you get a nice, even layer of gum tragacanth that is thin enough to cover the leather’s entire back evenly. It would be best if you worked in fast strokes with a toothbrush.
If you do not like how the gum tragacanth looks on your first try, let it dry overnight and try again. You will need to apply about 12 coats of gum tragacanth to the entire leather’s back surface area, but not all at once.
4.6. Groover & Stitching Spacer (Dampen Leather For This)
The Groover & Stitching Spacer is a tool used to help the leather lay flat while working on it. It’s usually made out of wood and rubs where the stitching will go. A groove is cut out of one side to fit over your stitching needle, and a spacer piece will be put on top, forming this groove.
Make any desired marks on the leather’s backside using your Groover and Spacer. You can also use a pencil for this, but beware that the lines may not stay visible on the dried leather.
Fill in with wax in all areas you want to burnish or stamp (use oil tan on black or deep colors). Press down with your first finger to transfer the wax onto all of those areas. Add additional layers if necessary for better coverage. Let it dry overnight or work on another area while waiting for it to dry.
4.7. Dye Leather
You should always make sure the leather is dry before dyeing it. Leather can be dyed using natural dyes, acid dyes, or direct dyes. Dye by rubbing a small dab of the colorant directly onto the leather and letting it sit for about 10-15 minutes before scrubbing off with a rag or cloth.
If you are dyeing aniline leathers, always let them dry overnight and give them another coat in the morning, so they don’t have any creases in them when they’re done! Aniline leather can also be sealed with fats and oils so that when you spill anything on it (like coffee), it doesn’t leave an ugly stain!
4.8. Apply A Finishing Coat
If you are working with leather that has a natural finish, it is always best to remember to apply a finishing coat, which gives your finished product a deeper, richer color and will help protect the surface of your leather.
To apply a finishing coat to the backside of your piece, use one or more layers, depending on what type of finish you want. Again, if aniline is being used as the base, then follow these steps:
Apply one or two thin layers of beeswax (or other animal fats) where you want your item to be oil-proofed. Let this layer dry overnight before applying any additional coats!
4.9. Sew leather Pieces Together
The final stage is to sew your leather pieces together. You do this by hand stitching, not by machine. It is easier if you use a leather needle and a leather thimble. Leather sewing needles can be expensive, but luckily, you can replace the thimble with a wood or plastic one as they are small and thin. Just make sure you leave room for your fingers to be able to slip under the needle’s head.
And that’s a basic workflow for leatherworking. As you get more experienced, you’ll find your own ways of working.
Finally, here are a few tips to remember:
Use whatever leather you can get from whatever animals you can find. That gives you practice in using different leathers and various types of tools on those leathers. You will never be a good leatherworker if you don’t practice on many different kinds of skins, so take every opportunity to do so. You may need to buy a small amount of quality leather to make something just right; the rest is all experimentation.
I hope you’ve enjoyed this guide! If you have any questions or want to share your tips and tricks with us, we’d love to hear from you.